Wet And Wild: How To Repair Water Damage Like A Pro
Picture this: You’re having a fantastic day, feeling like you’ve been touched by Lady Luck herself. Then suddenly, it happens – that dreaded moment when you notice water seeping into your home.
In an instant, all those good vibes are washed away as panic sets in. You may feel overwhelmed and unsure of what to do next, but don’t worry!
I’m here for you with some tried-and-tested tips on how to tackle water damage like the pro that you truly are. As a seasoned water restoration specialist who’s helped countless others save their homes from watery chaos, I know the importance of acting quickly and efficiently to minimize damage and restore peace of mind.
This article is designed to arm you with the knowledge and tools necessary to handle any soggy situation that comes your way so that you can confidently dive in (pun intended) and take control of the problem at hand.
Because let’s face it—as much as we love helping others out, sometimes there’s no greater service than being able to rescue our own sanctuary from potential ruin. So grab your metaphorical life jacket, because together we’ll navigate through these wet and wild waters until everything is back to smooth sailing once again!
Identifying The Source Of The Water Damage
Ahoy mateys, let’s embark on a thrilling adventure to conquer water damage! As your trusty restoration specialist sidekick, I’m here to guide you through the process like a seasoned pro.
First things first: identifying the source of the watery nemesis is crucial in not only repairing the damage but also preventing recurrence. Let me tell you, there’s nothing more satisfying than helping others by restoring their homes and keeping future mishaps at bay.
Now that we’ve got our mission laid out, it’s time for some detective work. Keep an eye out for common culprits such as leaky pipes, faulty appliances or sneaky roof leaks – they’re notorious for causing havoc when left unchecked.
Remember, knowledge is power; therefore, understanding and identifying causes are essential steps towards victory against water damage. With our combined forces, we’ll be unstoppable in putting an end to these aquatic offenders and ensuring a safe haven for all those who rely on us.
Now hold onto your hats because up next comes one of my favorite parts: extracting standing water!
Extracting Standing Water
Alright folks, let’s dive right into extracting standing water – a crucial step in repairing water damage like a pro. This process can be quite labor-intensive and may require some specialized equipment, but don’t worry; I’m here to guide you through it all! We’ll focus on the most effective techniques for getting rid of that pesky water and preventing flooding in the future.
Here are my top 5 tips to help you extract standing water properly:
- Invest in installing sump pumps: These handy devices will pump out excess water from your basement or crawl space, helping prevent any further damage.
- Use wet-dry vacuums: They work wonders when it comes to sucking up smaller amounts of standing water.
- Consider renting a submersible pump: If you’re dealing with larger areas of water accumulation, these powerful pumps can remove large volumes of water quickly.
- Utilize mop and bucket combos: Good old-fashioned elbow grease never hurt anyone! Mop up as much excess water as possible before using other methods.
- Apply absorbent materials: Items such as towels, blankets, and even kitty litter can help soak up leftover moisture around affected areas.
After successfully removing the bulk of the standing water, we’ve made significant progress towards restoring your property. But our job isn’t done yet! We need to ensure there is no lingering moisture hiding behind walls or under flooring.
And do you know what’s next? That’s right: setting up drying equipment.
So let’s keep going and tackle this important task together.
Setting Up Drying Equipment
Choosing the right equipment for the job is key. I need to look at the size of the area and the level of water damage to determine what kind of drying equipment to use. When setting up the equipment, I need to make sure that it’s placed in the optimal positions for maximum success. Finally, I need to monitor the drying process regularly to make sure it’s progressing at a steady rate.
Choosing Equipment
Picture yourself faced with a wet and wild disaster in your home, feeling overwhelmed but determined to tackle the water damage like a pro.
As you’re setting up drying equipment, one of the first things you’ll need to consider is choosing the right equipment for the job. Speaking from my own experience as a water damage restoration specialist, I’ve seen how important it is to weigh the pros and cons of renting vs. buying when assessing costs.
Keep in mind that serving others often starts by helping ourselves make well-informed decisions! So, take your time evaluating what’s best for your specific situation – after all, expertly repairing water damage means having reliable tools at hand.
Setting Up
Now that you’ve carefully assessed the damage and determined the costs of acquiring the right equipment, it’s time to set up your drying arsenal like a true professional.
Remember, friends, serving others starts with being prepared ourselves!
As a water damage restoration specialist myself, I know how crucial proper setup is for achieving effective results.
So let me guide you through this process: make sure all devices are in optimal working order and strategically placed around affected areas.
This will ensure maximum airflow and promote quick evaporation – helping both you and those around you get back on dry land sooner than later.
Monitoring Drying Process
Now that we have our drying equipment set up like true professionals, it’s crucial to keep a watchful eye on the progress.
Monitoring humidity levels and assessing the impact of your efforts is essential for serving those around you effectively.
As a fellow water damage restoration specialist, I can’t stress enough how vital this step is in ensuring a successful job!
By regularly checking moisture readings and making adjustments accordingly, we’re not only ensuring that things are drying as they should be but also demonstrating our commitment to providing top-notch service.
After all, nothing says ‘I care’ quite like going above and beyond to restore normalcy to someone’s life during their time of need.
So let’s continue working together with diligence and dedication as we monitor the drying process – bringing peace of mind back into our clients’ lives one dehumidifier at a time.
Removing Damaged Materials
Now that you’ve got the drying equipment up and running, it’s time to tackle the next challenge.
How can you determine which materials are beyond repair? Evaluating damage is critical in this stage of water restoration to make sure your efforts aren’t wasted on unsalvageable items.
Start by examining affected walls, floors, and furniture – keep an eye out for signs of warping or rotting. When assessing costs, consider whether repair is more cost-effective than replacement.
Remember: saving a few dollars now might not be worth potential problems down the line if damaged materials are left untreated.
As you remove these damaged materials from your space, think about how gratifying it will feel knowing you’re helping someone restore their home back to its pre-water-damage state.
Once all unsalvageable items have been removed, we’ll move onto our next task: cleaning contaminated areas to ensure a safe environment for everyone involved.
Cleaning Contaminated Areas
Now that we’ve covered repairing water damage, let’s dive into cleaning contaminated areas.
It’s crucial to give these spaces some TLC because if you don’t, harmful bacteria and other contaminants could linger around your home.
As a water damage restoration specialist, I can assure you that using the right cleaning techniques will help restore your space to its pre-damage condition while also providing a healthier environment for you and your loved ones.
In this section, we’ll explore various prevention strategies to keep those pesky contaminants at bay while also ensuring thorough clean-up of affected areas.
Trust me – with years of experience under my belt helping folks like you bounce back after floods or burst pipes, I know just how important it is to tackle water damage head-on by addressing any lingering contamination issues promptly.
So stick with me as we journey together towards a cleaner, safer future!
Next up: disinfecting to halt mold and mildew in their tracks.
Disinfecting To Prevent Mold And Mildew
I’m a water damage restoration specialist, and I know that using disinfectants is key to preventing the growth of mold and mildew. Controlling the humidity in the home is also important, since mold and mildew thrive in moist environments. Finally, it’s important to clean thoroughly to make sure there’s no dirt or dust for mold and mildew to feed off of.
Using Disinfectants
Now, we all know that using disinfectants is a crucial step towards safeguarding our spaces from mold and mildew after water damage.
As a water damage restoration specialist, I can’t stress enough the importance of sanitizing surfaces to ensure your home or workspace remains both safe and healthy for everyone.
Using bleach is an excellent way to kill any lingering bacteria or fungi that may be hiding in crevices or damp areas.
Remember, it’s not just about restoring what was lost; it’s also about doing our part to create clean environments where people feel comfortable returning to their daily routines with peace of mind.
So let’s roll up our sleeves and get started on making those damaged areas as good as new!
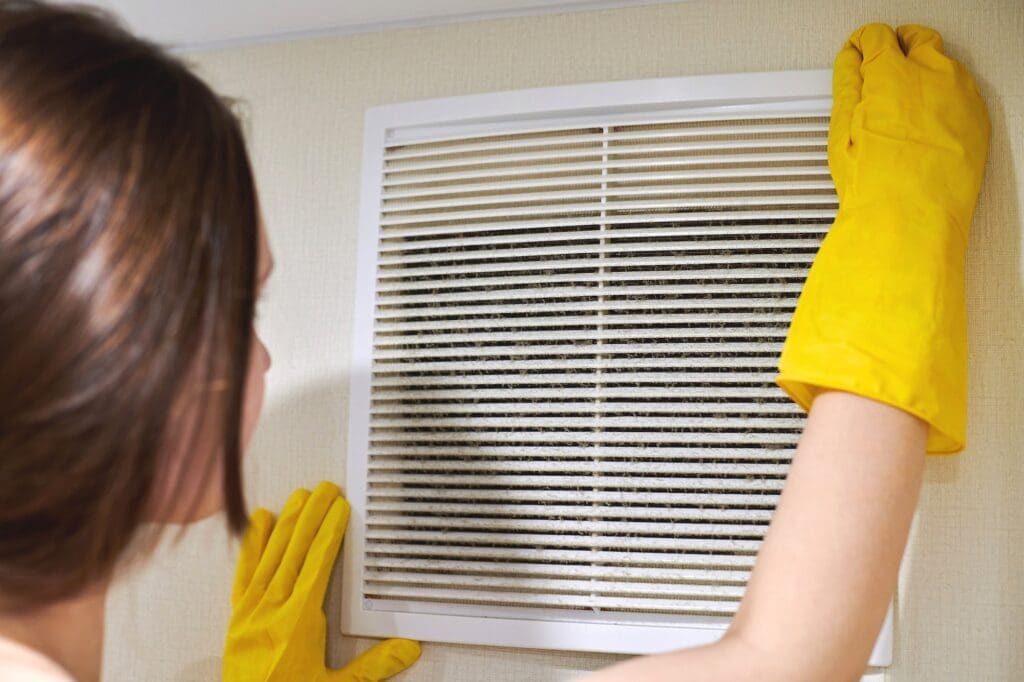
Controlling Humidity
Now that we’ve tackled the disinfection process, let’s focus on another key aspect of mold and mildew prevention: controlling humidity.
As a water damage restoration specialist, I can’t emphasize enough how essential it is to maintain proper indoor moisture levels.
Not only does this help in preventing condensation on windows and other surfaces, but it also keeps damp walls at bay.
So, what can you do to keep humidity under control?
Simple steps like using exhaust fans or dehumidifiers go a long way in keeping the environment comfortable while serving others by creating healthy spaces for them to thrive in!
Plus, maintaining adequate ventilation ensures everyone can breathe easier without worrying about unwanted mold spores lurking around every corner.
Cleaning Thoroughly
Now that we’ve talked about controlling humidity, let’s dive into another crucial aspect of mold and mildew prevention: cleaning thoroughly.
As a water damage restoration specialist, I know how vital it is to use the right cleaning supplies and drying techniques when tackling damp or contaminated areas. Trust me; you’ll thank yourself later for putting in the extra effort!
By taking the time to clean every nook and cranny, not only will your space look fresh and inviting, but you’ll also be creating an environment where others can enjoy healthy surroundings without fear of mold-related issues.
Together, we can make a difference by ensuring our homes and workplaces are clean, dry, and free from harmful contaminants that may impact those we care about most.
So get ready – it’s time to roll up our sleeves and show mold who’s boss!
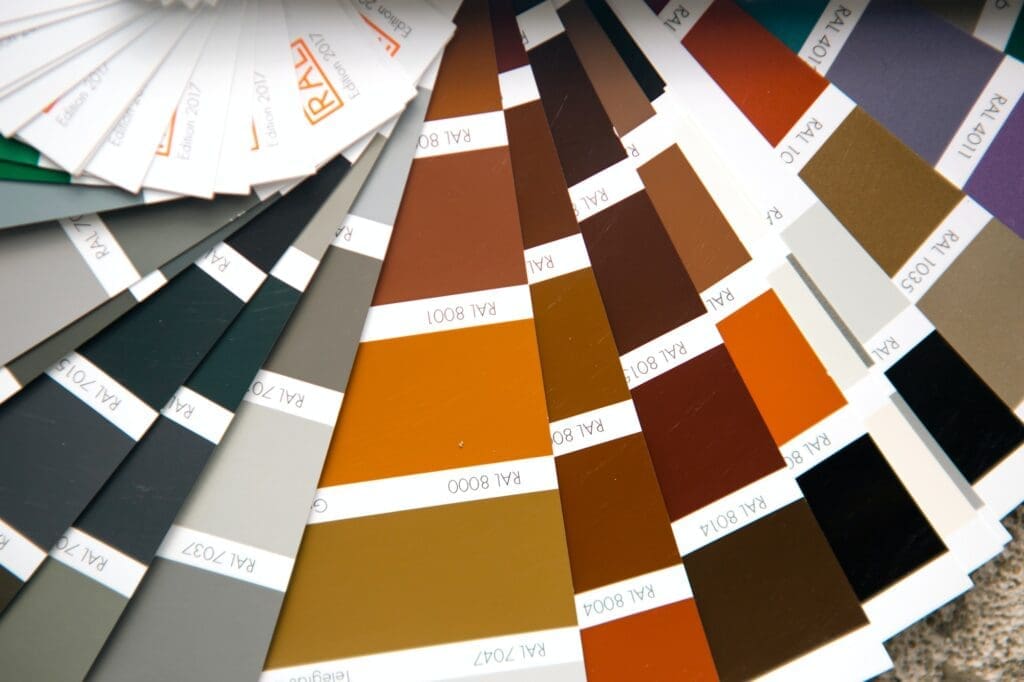
Applying Primer And Paint
Did you know that approximately 98% of basements in the US will experience some type of water damage during their lifespan? With such a high probability, it’s essential to be prepared and learn how to repair water damage like a pro.
After addressing the source of the issue and drying out your space, applying primer and paint is an excellent way to refresh prepped surfaces while also helping prevent future moisture issues. As a water damage restoration specialist, I can’t emphasize enough how crucial this step is for both aesthetics and long-term durability.
Before diving into painting, let me share with you my top three tips for achieving professional results:
- Properly mix your paint: Take your time when mixing paint; thorough blending ensures consistent color throughout application.
- Prep those surfaces: Clean walls thoroughly with mild soap and water before priming – any remaining dirt or grease can interfere with proper adhesion.
- Invest in quality materials: High-quality primer and paint products offer better coverage, longevity, and protection against future moisture problems.
As someone who genuinely cares about serving others, I encourage you not only to follow these steps but also take pride in restoring your home after experiencing water damage. By completing this process correctly, you’ll have peace of mind knowing your living space looks great while being protected from potential issues down the road.
Now that we’ve covered repairing walls, our next task involves tackling another critical component affected by water damage – replacing carpet and flooring. So let’s roll up our sleeves and get started!
Replacing Carpet And Flooring
Now that we’ve covered the basics of repairing water damage, let’s dive into one of my favorite topics: replacing carpet and flooring. After all, a beautiful home is built from the ground up!
Whether it’s due to flooding or a minor leak, water can severely damage carpets and floors – but don’t worry, I’m here to help you bring them back to life. Installing insulation beneath your new flooring will not only keep your space cozy but also reduce noise levels (trust me, your neighbors will thank you).
While assessing costs might seem daunting at first, remember that investing in high-quality materials now will save you money on repairs down the road. Plus, there’s nothing better than knowing you’ve contributed positively to someone else’s well-being by creating a warm and welcoming environment for them to enjoy.
So go ahead, treat yourself (and others) to some stylish new flooring – just make sure it won’t break the bank! With our expert guidance and keen eye for detail, you’ll have those floors looking fabulous in no time. But before we get carried away with design choices and color palettes, let’s move onto our next important step: dehumidifying to prevent further damage.
Dehumidifying To Prevent Further Damage
Now that we’ve tackled the initial cleanup, let’s focus on dehumidifying to prevent further damage.
Assessing humidity levels is crucial in this process because if left unchecked, high moisture can lead to mold growth and structural issues. To properly evaluate drainage and ensure your space is drying efficiently, you’ll want to invest in a reliable dehumidifier tailored for water damage restoration.
Remember, our goal here is not only to dry out the affected area but also maintain a healthy environment while serving others with care and effectiveness. So as we work through this process together, keep an eye on those humidity levels and adjust your dehumidifier settings accordingly.
With proper attention and effort put into dehumidification, you’ll be one step closer towards restoring normalcy after water damage! And with that said, let’s dive right into final inspections and repairs – it’s time to wrap up this project like the pro that you are!
Final Inspections And Repairs
Now that we’ve given your home a thorough ‘makeover’ to address those pesky water issues, it’s time for the cherry on top – final inspections and repairs. All joking aside, this step is crucial in ensuring everything has been properly addressed so you can confidently move forward with peace of mind.
As a water damage restoration specialist, I’ll walk you through some key aspects during this phase:
- Double-checking structural integrity
- Evaluating costs of remaining work
- Working with insurance claims (if applicable)
- Ensuring proper mold remediation
Before wrapping up our watery adventure together, let’s not forget about evaluating costs and working closely with insurance claims if needed. These factors are essential when determining how much more needs to be done, as well as getting back on track financially after an unforeseen incident like water damage.
Remember, serving others starts by taking care of ourselves first. You’ve made great strides in repairing the water damage and safeguarding your home against future mishaps. Take pride in knowing that you tackled this challenge head-on and emerged victorious!
While I hope your journey towards a drier abode was smooth sailing overall, don’t hesitate to reach out should any new concerns arise down the line. After all, being proactive is always better than facing another round of wet-and-wild mayhem!
Frequently Asked Questions
How Do I Determine The Extent Of Water Damage In Areas That Are Not Easily Visible, Such As Behind Walls Or Under Flooring?
I know you might be worried about those hidden spots where water damage could be lurking, like behind walls or under flooring. It’s important to take the time and effort to check these areas thoroughly for any signs of moisture, as this can help prevent further problems down the line.
Moisture proofing is key in these situations, so keep an eye out for dampness, mold growth, or a musty smell – all telltale signs that there’s an issue hiding away. As a water damage restoration specialist, I believe that drying out the affected areas quickly and efficiently should always be prioritized.
Remember that we’re all here with a common goal: helping others by providing top-notch service and expert advice on how best to deal with these pesky water issues!
What Are The Common Signs Of Water Damage That I Should Look Out For In My Home To Catch The Issue Early?
In our homes, it’s essential to keep an eye out for common signs of water damage so we can catch any issues early and prevent further harm.
As a water damage restoration specialist, I recommend conducting regular moisture inspections and applying protective coatings to vulnerable areas as part of your proactive approach.
Some red flags you should watch for include discolored or peeling paint, damp spots or musty smells on walls and ceilings, warped or buckling floors, mold growth, and increased humidity levels inside the house.
By being vigilant about these indicators, not only will you be safeguarding your home from extensive damage but also contributing towards creating healthier living spaces for those around you who might need assistance in maintaining their own homes.
How Long Does It Typically Take For Mold And Mildew To Develop After Water Damage Has Occurred, And What Are The Health Risks Associated With Mold Exposure?
Mold and mildew might make their mark much more quickly than you’d think, with these pesky fungi potentially proliferating in as little as 24 to 48 hours after water damage has occurred.
As a water damage restoration specialist, I cannot emphasize enough the importance of swift action for mold prevention and thorough water proofing to keep your home healthy and happy.
Mold exposure can lead to various health risks such as respiratory problems, allergic reactions, headaches, and even long-term complications if left unchecked.
So let’s come together as caring individuals dedicated to serving others by always staying vigilant about potential water damage signs and taking prompt measures against them – because a healthy home is a happier one!
Are There Any Specific Types Of Paint, Primer, Or Flooring Materials That Are More Resistant To Water Damage And Mold Growth For Future Prevention?
Absolutely! As a water damage restoration specialist, I can tell you that using the right materials makes all the difference in preventing future water damage and mold growth.
Opting for breathable paint allows moisture to escape from your walls, reducing the likelihood of trapped moisture leading to mold issues.
Additionally, applying sealant protection on surfaces like wood or concrete enhances their resistance to water penetration.
For flooring options, consider materials such as waterproof laminate or vinyl plank flooring – they’re not only stylish but also provide excellent defense against potential damage.
Remember, investing in these preventive measures now will save you time, money, and energy down the road while keeping your home safe and healthy for years to come.
When Should I Consider Hiring A Professional For Water Damage Repair, And What Qualifications Should I Look For In A Water Damage Restoration Company?
You should consider hiring a professional for water damage repair when the costs involved and potential health risks become too overwhelming to handle on your own.
A reputable water damage restoration company will have experienced technicians, proper certifications, and insurance coverage to ensure that the job is done right.
When searching for a reliable team, make sure they’re certified by industry organizations like the Institute of Inspection Cleaning and Restoration Certification (IICRC) or the Restoration Industry Association (RIA).
Working with professionals not only gives you peace of mind but also helps in preserving the integrity of your home while potentially saving you money in future repairs.
Remember, we all have a responsibility to serve others – so don’t hesitate to call in experts who can help protect both your property and the well-being of those around you from further harm caused by water damage.
Conclusion
In conclusion, dealing with water damage can be quite a daunting task for any homeowner. However, being proactive and vigilant about detecting the signs of water damage early on can save you from more extensive repairs in the future.
It’s essential to remember that while some DIY methods may help resolve minor issues, it’s always best to consult professional assistance when in doubt.
As a water damage restoration specialist, I cannot stress enough how vital it is to address mold growth as soon as possible. Mold poses serious health risks if left untreated, so don’t hesitate to take action immediately after discovering water damage.
Additionally, investing in water-resistant paint, primer, and flooring materials can go a long way in preventing further problems down the line.
Lastly, hiring a reputable and qualified water damage restoration company should never be overlooked. These professionals have the necessary knowledge and experience to effectively repair damaged areas and ensure your home returns to its pre-damaged state. Remember that restoring your home after significant water damage isn’t just about aesthetics; it’s also crucial for maintaining your family’s safety and well-being.